Traveling offers endless chances to capture new sights and experiences, and today, anyone can take beautiful photos with their phone. You don’t need a fancy camera—knowing the right travel photography tips for your phone can turn simple snapshots into eye-catching memories. With just a few adjustments and techniques, mobile photography can help travelers create photos that stand out and tell a story.
Learning how to frame a scene, find the best light, and use your phone’s camera settings makes a big difference. Small steps like cleaning your lens, steadying your hands, or using grid lines can quickly improve the quality of your shots. By practicing these tips, anyone can start capturing travel moments that they’ll be proud to share and remember. For more practical advice, check out these essential smartphone travel photography tips.
Key Takeaways
- Simple phone techniques can create impressive travel photos
- Good composition and lighting make photos stand out
- Editing on your phone enhances your best travel shots

Getting Started With Phone Travel Photography
Smartphone travel photography is simple to start but requires some careful choices and preparation. Success depends on knowing what features matter most, understanding settings, and taking care of your device.
Choosing the Right Smartphone Camera
Not all phone cameras are equal. Look for a smartphone with a camera that has a larger sensor, optical image stabilization, and a wide aperture (like f/1.8 or lower). These features help capture clear, bright images, especially in low light.
Many newer smartphones offer multiple lenses, such as ultra-wide or telephoto. This lets the user shoot landscapes, street scenes, and portraits with more flexibility.
Resolution matters, but more megapixels don’t always equal better photos. Image processing software inside the phone is just as important. Devices from major brands like Apple, Samsung, and Google often perform well in mobile photography due to their software and consistent updates. For more tips on picking your phone camera, see this guide on how to take great travel photos with a smartphone.
Understanding Essential Camera Settings
Learning to use camera settings helps improve photo quality quickly. Key settings include focus, exposure, and HDR (High Dynamic Range). Tap the screen to set focus, then adjust exposure by sliding up or down. Turning on grid lines helps with composition and keeping horizons level.
HDR mode is helpful for balancing bright and dark parts of outdoor scenes. Burst mode captures quick sequences and works well with moving subjects or group shots. Users should avoid using digital zoom since it lowers image quality; instead, they should move closer when possible.
Apps with manual controls allow adjustment of ISO, shutter speed, or white balance. This lets users take more creative control in tricky lighting. Photo editing with basic apps, like Snapseed, helps fine-tune color and sharpness after shooting. For a full list of smartphone photography tips, see this detailed guide.
Cleaning and Maintaining Your Lens
A dirty lens leads to blurry or foggy images, no matter how advanced the smartphone camera is. Wiping the lens with a soft, clean cloth before each shoot is a simple but critical habit. Avoid using shirts or rough materials, which can scratch the lens surface.
Dust, fingerprints, and pocket lint collect easily since most phones are carried loose. Keeping the phone in a case with a lens cover reduces buildup. In humid places, condensation may occur; letting the phone adjust to outdoor temperatures first helps prevent lens fog.
Carrying a small microfiber cloth in a camera or travel bag makes maintenance easy. Clean gear ensures every picture looks sharp and clear, letting the camera perform its best every time. For more cleaning tips, visit this article on essential smartphone travel photography.

Composition Techniques for Stunning Mobile Photos
Great travel photos depend on strong composition. Good techniques help mobile photographers create balanced, eye-catching images that highlight the beauty of any destination.
Applying the Rule of Thirds
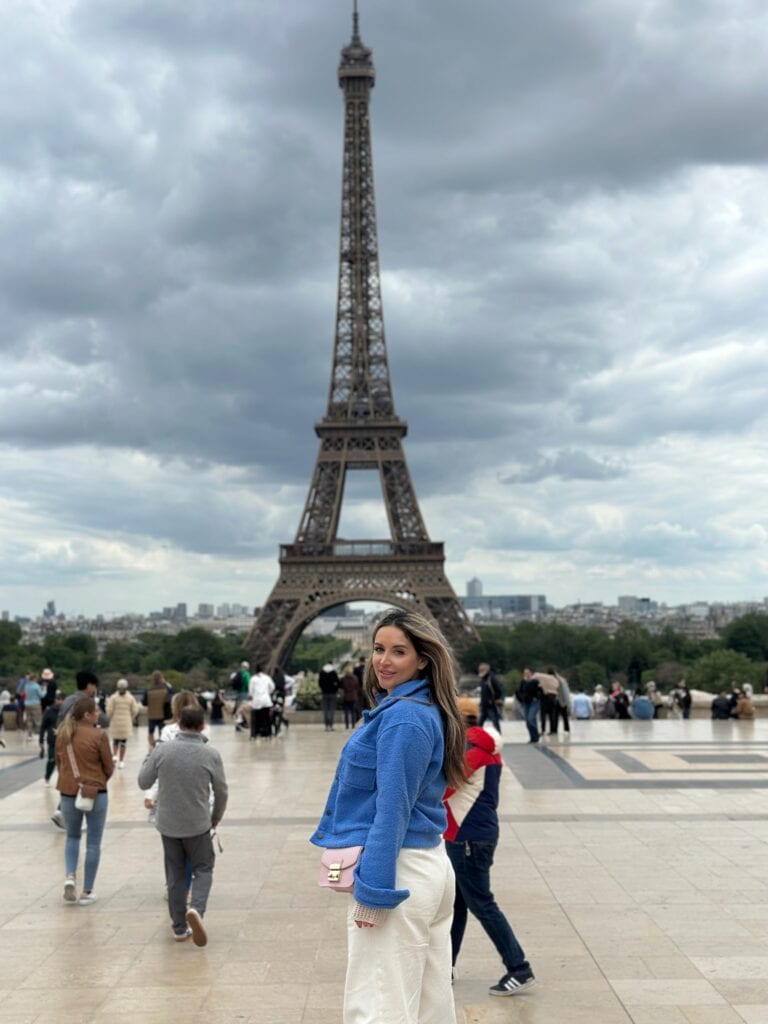
The rule of thirds is a basic guide for framing photos. It suggests dividing the image into a 3×3 grid, placing important subjects along the lines or at intersections. This approach creates balance and prevents the subject from being stuck in the center.
Most smartphones let users turn on a grid overlay in the camera settings. For landscapes, placing the horizon along the top or bottom grid line can make the picture feel more spacious and professional. For portraits or street photos, positioning the main subject at one of the intersection points draws attention naturally.
Photographers who try different placements—such as moving the subject to a side—often see their travel photos improve. Adjusting the frame as scenes change helps capture unique looks during a trip.
Using Leading Lines and Symmetry
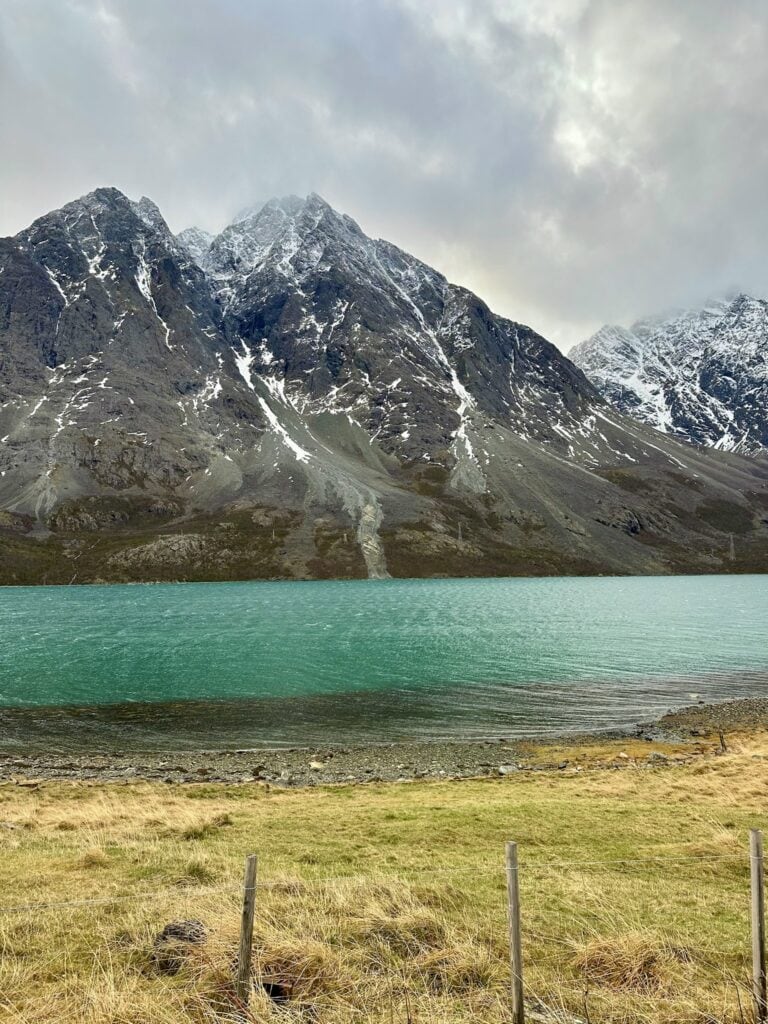
Leading lines are found in roads, fences, rivers, or even patterns in the ground. These lines guide the viewer’s eye to the main subject or point of interest. Positioning a path or railing from the edge of the frame toward the subject adds depth and helps tell a story.
Symmetry creates a balanced effect, especially in architecture, water reflections, and cityscapes. Placing the dividing line in the center or mirroring objects on each side creates harmony.
For example, city bridges or building windows are great chances to use leading lines and symmetry in mobile travel photography. Simple edits like cropping can also strengthen these effects when reviewing images after the shoot.
Working With Depth of Field
Depth of field controls how much of a photo appears sharp. A shallow depth of field blurs the background, making the subject stand out. Some phones offer “Portrait” mode, which makes this easy even for beginners.
To get sharp travel photos, tap the screen to focus on the main subject. Get close for a stronger blur, or step back to keep more of the scene in focus. Combining depth of field with strong composition brings more attention to the parts of the scene that matter.
Trying out these options helps travelers highlight city details, landscapes, or even food shots, making memories feel more vivid and alive. Even simple adjustments with a phone’s camera can create a strong sense of place and story in travel images.

Mastering Lighting in Travel Phone Photography
Good lighting can turn ordinary travel photos into memorable ones. Understanding how to use natural and artificial light with a smartphone camera is essential for clear, vibrant images in different conditions.
Capturing the Golden Hour
Golden hour happens soon after sunrise and just before sunset. During this time, the sunlight is soft, warm, and less intense, which helps reduce harsh shadows and creates flattering tones in travel photos.
Shooting in golden hour can make landscapes glow and skin tones look natural. Travelers should plan their main photo sessions for this part of the day when possible.
Enable the grid in the camera settings to help line up the sun or horizon. A tripod or stable surface can help keep the smartphone camera steady as the light is often lower at these times. This calm light works well for portraits, cityscapes, and nature scenes.
For more on making the most of natural lighting, see these smartphone lighting tips.
Shooting in Low Light and Night Mode
Low light and night photography are often difficult because images can turn out grainy or blurry, especially with a phone. Modern smartphones include night mode, which uses longer exposure and software to produce clearer, brighter pictures in dark scenes.
When using night mode, it is best to hold the camera as steady as possible. Leaning against a wall or setting the phone down can help. Look for light sources such as street lamps or shop windows to brighten the scene without overexposing important details.
Avoid using the zoom in low light, as this can make images less sharp. Instead, move closer to the subject. Night mode works best for city lights, landmarks, or indoor scenes without a lot of movement.
For more details on camera controls in low light, visit this travel phone photography guide.
Managing Harsh and Backlighting Scenarios
Midday sun or strong backlighting can cause problems with contrast and shadows. When shooting in strong sunlight, subjects may appear washed out or have blown-out highlights.
To handle harsh light, use the HDR setting on a smartphone camera. HDR blends multiple exposures so both bright and dark areas are balanced. Position the subject so the light is either behind or beside them, instead of directly overhead or straight on.
When dealing with backlighting (light behind the subject), tap the screen on the subject’s face. This makes the camera expose for their face and not just the background. For extra help, use a portable reflector or white surface to bounce light back onto the subject.
For more advice about dealing with difficult light, see these travel photography lighting tips.

Mobile Photography Tools and Techniques
Using the right tools and camera features can help anyone take sharper, more creative travel photos. A sturdy setup and a bit of creativity with mobile camera modes can greatly improve photo quality and unique results.
Utilizing Tripods and Image Stabilization
A steady hand is important, but tripods make all the difference for clear, sharp photos. Tripods are helpful in low light, during night shots, and for long exposure photos. Compact smartphone tripods are easy to pack and set up, whether capturing landscapes or group selfies.
Many phones now come with built-in image stabilization. This feature automatically reduces the blur caused by shaky hands. For walking shots or videos, pairing a tripod with a gimbal provides extra smoothness. Tripods are also essential for time-lapse and long exposure shots, where even tiny movements can make photos blurry.
- Key benefits of using a tripod:
- More stable shots in any lighting
- Hands-free selfies and group photos
- Better long exposure and motion blur captures
Combining these tools with good posture—keeping elbows close and standing still—will make every shot clearer and more professional. For more tripod options and tips, check out these mobile photography essentials.
Exploring Portrait Mode and Special Features
Most modern smartphone cameras offer portrait mode, which helps make the subject stand out by blurring the background. This creates a soft “bokeh” effect. Portrait mode works well for people, pets, and even objects, adding depth and focus to travel shots.
Special camera features like night mode, HDR, and manual controls can improve photo results in tough settings. HDR combines several shots to keep details in shadows and highlights. Night mode brightens dim scenes without needing a flash.
Manual settings allow users to adjust ISO, shutter speed, and white balance, giving much more creative control. Learning to use these smartphone camera features helps capture more dynamic and visually appealing photos. Learn about different creative camera features in this guide to smartphone travel photography.
Creative Approaches: Panoramas and Reflections
Panorama mode lets users capture wide landscapes, cityscapes, or crowded markets in a single photo. Slowly moving the phone across the scene will stitch together several shots for a smooth, wide-angle view. This is especially useful at scenic viewpoints, beaches, or busy city squares.
Reflections add another layer to travel photos. Using puddles, lakes, windows, or shiny surfaces can create mirror-like effects. To get the best reflection, keep the phone close to the reflecting surface and line up the angle carefully. Look for symmetry and natural light for stronger impact.
Creative techniques like these help turn ordinary scenes into memorable photos. Anyone can experiment with new angles, better framing, or unusual surfaces for standout images. More tips for unique mobile shots are found in this travel photography guide.

Editing and Enhancing Your Travel Photos
Editing helps make travel photos look more professional and shareable. The right mobile apps, editing techniques, and a consistent style can improve every picture and make memories stand out.
Essential Travel Photography Apps
Travel photographers often rely on a few key apps to edit photos on the go. Lightroom Mobile is popular for its advanced features and easy-to-use interface. Snapseed is free and packed with useful tools like selective adjustments and healing for removing unwanted objects from photos. VSCO offers artistic filters and simple adjustments for tone and color.
More specialized apps can add unique effects. Afterlight gives extra textures and frames, while TouchRetouch is handy for clearing up distractions in the background. Each app lets users adjust brightness, contrast, and color balance with simple sliders.
Sticking to one or two main apps avoids confusion and keeps the editing process fast. Many travelers share their best work on-the-go, so choosing apps that save images in high quality is important.
More tips on using apps for travel photography can be found at Travel Photography Tips and Tricks for Any Smartphone.
Editing With Lightroom Mobile
Lightroom Mobile is a favorite for editing travel photos because it provides powerful controls and works on both Android and iPhone. It can handle RAW images, which keeps more detail for editing, and syncs with desktop versions for users with Adobe accounts.
Some of the best features include:
- Exposure and contrast sliders to fix lighting.
- Color grading tools for adjusting temperature and tint.
- Presets for quick edits with a single tap.
Travelers often use the healing brush to remove spots or distractions and the selective tool to brighten only certain areas, like faces or skies. Many free presets online match different travel styles, from beach scenes to city nights. The app saves edited images in high quality for printing or sharing.
For more detailed steps, visit iPhone Travel Photography Tips for Instagram-Worthy Photos.
Maintaining Consistency and Quality
A consistent editing style helps create a recognizable look and makes a photo collection feel unified. Choosing a favorite filter, preset, or set of color adjustments and using them across most photos can give a similar mood or tone to an entire trip album.
Using the same app for most edits also helps keep colors and lighting similar. Editing on a clean screen and in good lighting helps avoid missing mistakes or over-editing, which can make photos look unnatural.
Travelers should avoid making images too bright or colorful. Simple edits often look best. Saving photos at a high resolution is important if they plan to print or post on social media, so always check the export settings in editing apps.
For practical advice on editing for quality and style, see 17 Practical Techniques that Guarantee to Elevate Your Travel Photo Editing.

Frequently Asked Questions
Travelers can take high-quality photos with just a phone using the right techniques. Basic camera settings, smart use of light, and simple composition rules can make a big difference.
How can I take professional-looking photos with my smartphone while traveling?
To get professional results, it’s important to clean the camera lens before shooting. Holding the phone steady with both hands helps prevent blurry photos.
Use the grid lines to follow the rule of thirds, and avoid digital zoom as it makes the picture less sharp.
Look for interesting angles or subjects that show local life or unique details. For more step-by-step ideas, see these mobile travel photo tips.
What are the best camera settings for travel photography on an iPhone?
Turn on the grid in the camera settings to help with composition. Keep HDR on auto to let the iPhone balance bright and dark areas.
Use Portrait mode to blur backgrounds for close-up shots, and adjust exposure by tapping and dragging on the screen.
For more control, consider using a camera app that allows manual changes to ISO, shutter speed, and white balance.
What are the essential rules of composition in mobile photography?
Composition is key for eye-catching photos. The rule of thirds divides the image into a 3×3 grid to help place key subjects off-center.
Leading lines, like roads or fences, can guide the eye to the main subject.
Avoid cluttered backgrounds by picking simple scenes or moving distractions out of the frame.
Can you suggest some effective techniques for better mobile photography?
Try different shooting angles such as getting low, shooting from above, or using reflections in glass or water.
Use burst mode for action shots to capture the perfect moment.
Panoramic mode is great for wide landscapes that won’t fit in a single frame. Tap to focus and adjust brightness as needed for each shot.
What should I look for to improve lighting in my phone travel photos?
Soft light at sunrise or sunset is best for both people and landscapes. Avoid taking photos in bright midday sun as it causes harsh shadows.
Indoors, move close to windows for natural light.
For night photos, stabilize the phone and avoid using the built-in flash, which often creates harsh light.
How can I maximize the use of my phone’s camera features for travel photography?
Experiment with different modes such as Portrait, Night, or Panorama. Try Live Photos or burst mode for moving subjects.
Keep apps like Snapseed or Lightroom Mobile ready for quick edits right on the phone.
Back up travel photos to the cloud or another device in case the phone is lost or damaged. For extra tips and tools, check out these mobile camera feature suggestions.
You Might Also Like:
If you enjoyed this post on How To Take Amazing Travel Photos on the phone, you might also like: Solo Travel Made Easy: How To Stay Safe And Explore The World, How to enhance Travel Experiences in Your 30s, Travel Safety Tips: Essential Advice for a Secure Trip
